Image Map
Showing posts with label Chalkboard Paint. Show all posts

Tuesday, May 1, 2012

Well Crafted Wednesdays Link Party #2

Thank you to everyone who made our first Well Crafted Wednesday such a great success!!! I am so excited because this week I get to have my first "most clicked" link and it just so happens that she is also my newest bloggy friend!

Meet Jackie from Pleasure in Simple Things! She made these awesome magnetic chalkboards that can be used for SO many things!


You could use them as place cards, a clean/dirty notice for the dishwasher,a cute note that you could leave for your hubby on the mirror in the morning. It has a TON of uses!

Thanks so much for the great idea, Jackie! I have already made my magnet for the dishwasher and its so handy! :) You can feel free to grab the following button since you have been featured at Well Crafted Wednesdays!

The Well Crafted Home


Now, on to the party!!!!!! I am SO excited to host again this week so lets get this party started!!!

You guys know the drill!
  1. Please link up directly to your project, not you homepage! Also, your project MUST be made by you :)
  2. Please follow my blog! :)
  3. Please grab the button below and post it somewhere on you blog for people to see! The more people that join us for the party, the more fun it will be!
  4. Be sure to leave a comment for the person above you AND below you. We all love comments :)
  5. Link up as many projects as you want but please no giveaways or links back to your party! Thanks!! :)
The Well Crafted Home


 photo TheWellCraftedHome_zps26a4d5c3.png

Monday, April 23, 2012

Made By Me Mondays #3: Chalkboard Menu!

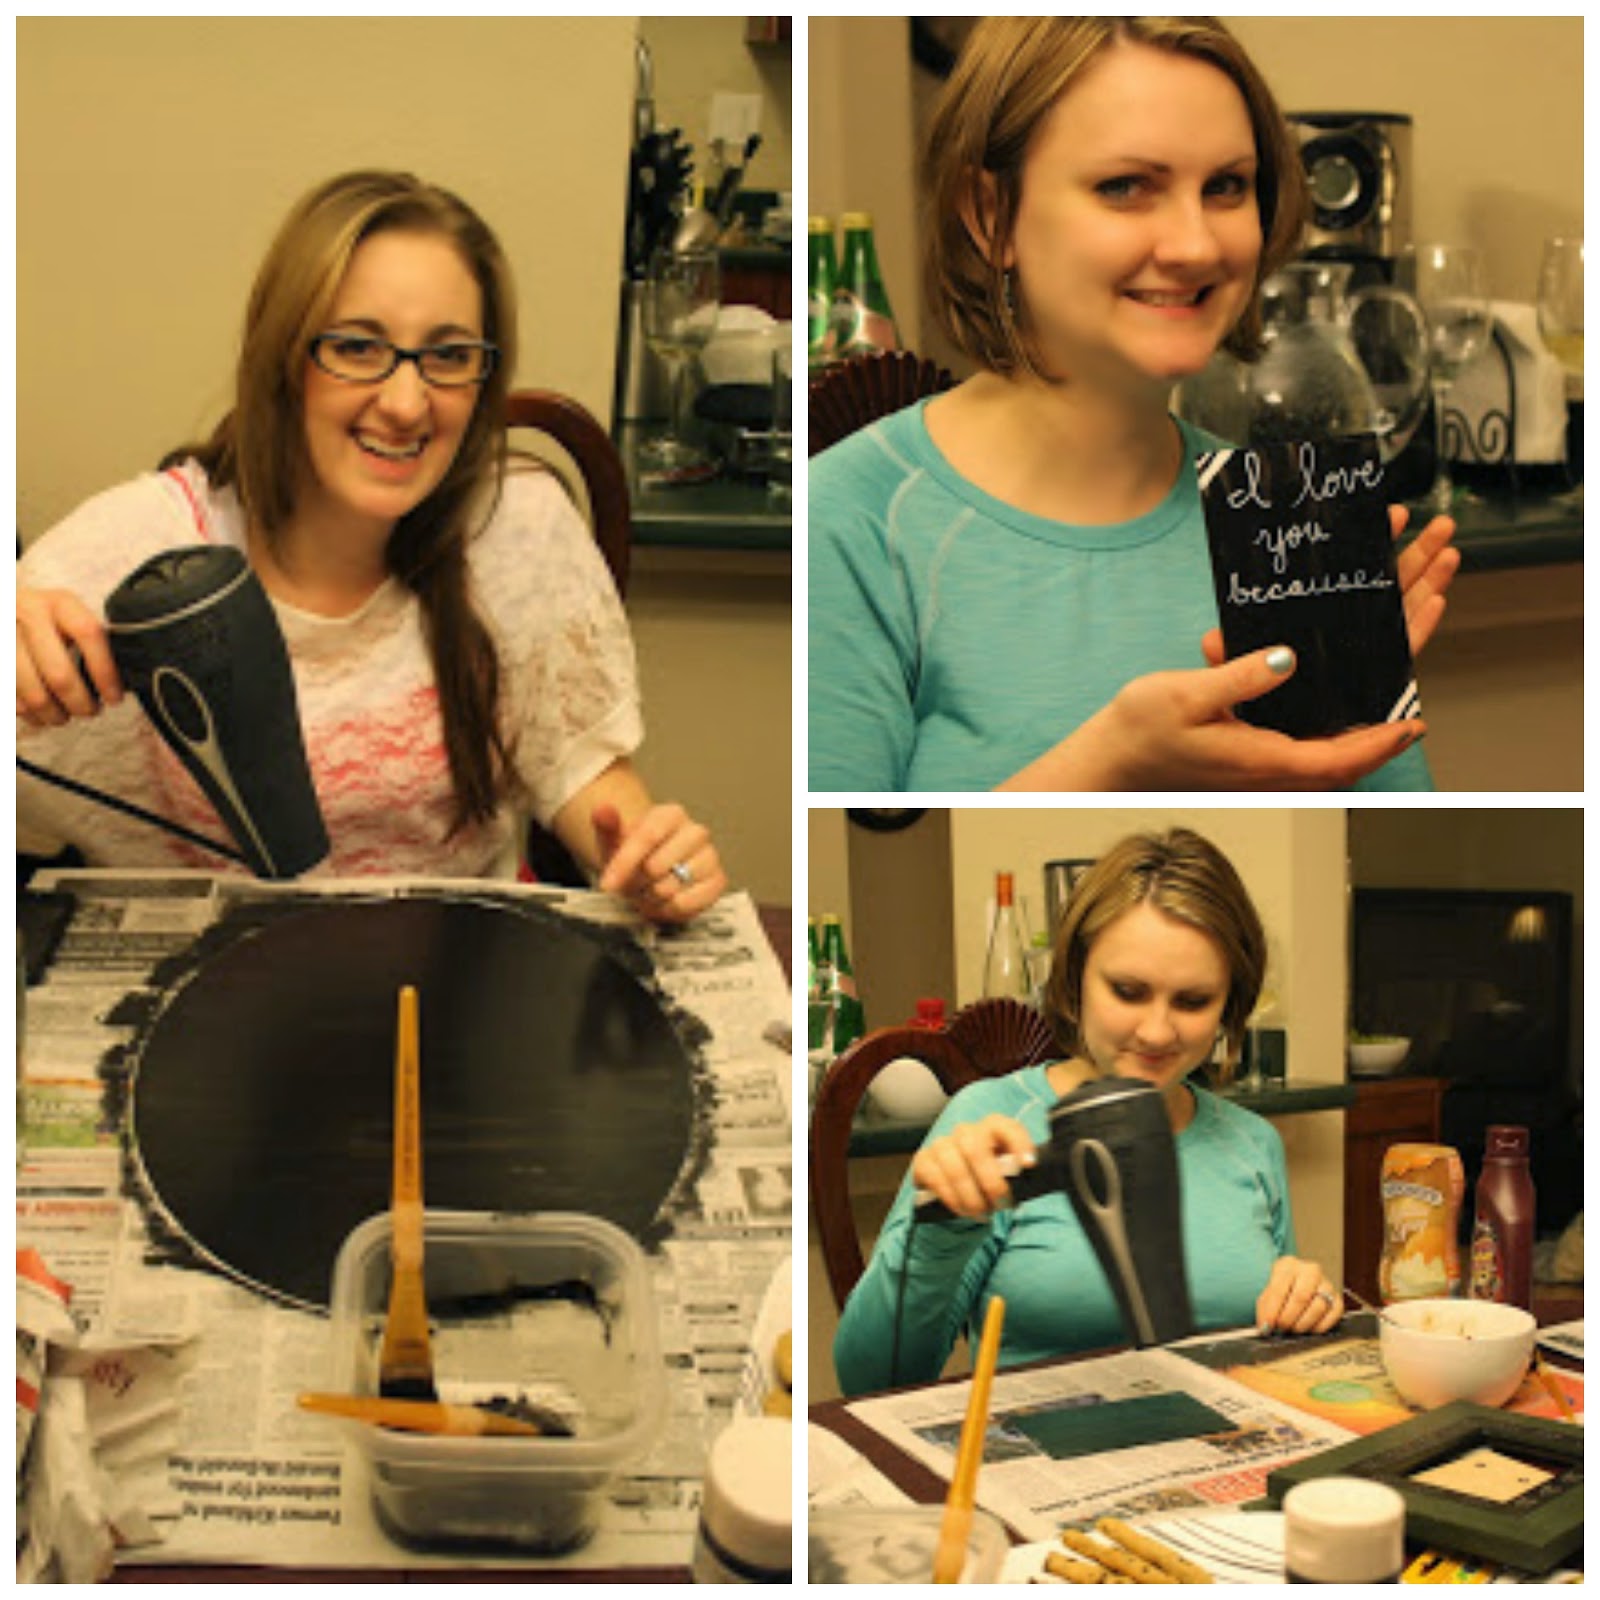
This weekend I got together with some of the girls from my Bible study and we had some good hang out/crafting time and we made Chalkboards!


We decided to make chalkboards for our project but I had never used chalkboard paint before and didn't plan ahead very well. The bottle said "allow 1 hour to dry between each layer painted" and of course I didn't even think about drying time!

We all painted our first layer and used a hairdryer to dry it a little quicker (this is actually a pretty good substitute if you are short on time!). When we painted our second layer, it did make a few lumps but now that it is fully dry you can hardly tell.

Since it had to dry for 24 hours before you could put anything else on it, our craft night had to come to an end before we could put chalk on our finished projects but here are some pictures from our craft night!


We had 4 girls there total (including myself) but for some reason I only got pictures of two of the other girls! Sorry Erika! I will be a better picture taker next time!

Ok! Now on to the tutorial!!

Step 1:

As always - gathering the right materials! Here is what you will need:
Picture frame - whatever size you want. (Michaels) I got a frame that was tall and skinny so I could make a weekly menu.
Paint brushes (Michales)
Chalkboard Paint (Michaels) I used Martha Stewart paint and it worked great and was the cheapest of the ones I could find.
Painters Tape (Michaels)
White paint pen (Michaels)
Chalk (Michaels)
    Step 2:

    Prep the frame. Take out the glass, matting, and stock photos that are in the frame. You can can choose to not use the glass like I did or you can keep it like the other girls did (which seemed to work great!)


    Step 3:

    Start painting! You can either paint the backing of the frame or the glass! Both look good and as far as I can tell, both work!


    Step 4:

    Let first layer dry and paint the second layer. (Sadly, this is when girls night ended) :(

    Step 5:

    Tape off the places that you want to paint with the grey chalkboard paint and paint the areas that you want to be grey with 2 layers of the grey paint. Once its almost dry, peel off the paint.


    Step 6:

    Once its fully dry, use your white paint pen to make little dots (or whatever you prefer) in between the colors.


    Step 7:

    Once dry, place the painted board (or glass) back in the frame! Be sure not to write the days on it before you put it back in the frame! I did and I had to paint over them because they were hidden by the frame once I placed it in. Must I always learn the hard way? :)

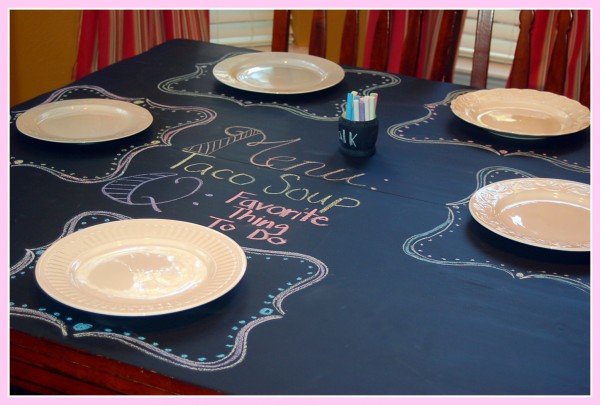
    Once the board is in the frame you can write "MENU" at the top like I did or whatever else you like! Here is what it looked like when I finished:


    You can see it right when you walk into the kitchen and it just happened to have the perfect spot in our home!

    Thanks girls for a great craft night!!

    Before you go, I have an exciting announcement!! I will be starting my own weekly link party here on my blog!! I am SO excited! It will open up on Tuesday at midnight so get ready to link up your creations!!

     photo TheWellCraftedHome_zps26a4d5c3.png

    Wednesday, April 18, 2012

    Chalkboard Dining Room Table

    I remember when I was in school and I would get in trouble for doodling in my notebook. My teacher would always say "Put that away and pay attention!" but she didn't realize that the doodling helped me to focus on what I was learning.

    If my desk at school had been like this dining table that I found over at We Are THAT Family, I might have gotten better grades!


    Kristen created this beautiful table for her family by re-purposing her old dining room table and painting it with chalkboard paint!

    I asked her how she came up with this idea and it turns out, her kids (like many others out there) have the same doodling habit that I do! She said that this table really helps them to focus when they are having their family devotions time.

    Check out this cool picture that her husband drew of the verse that they were learning!


    Awesome job Kristen! I love the idea of using this table to draw your verses! What a great way to instil those values into your children! I will have to remember that one. :)

    If you want to create this awesome project, click here for the tutorial!

     photo TheWellCraftedHome_zps26a4d5c3.png