

As you all know by now, I'm pregnant and even though I'm not very far along, my nesting instincts are starting to kick in a little bit. I'm feeling the need to organize the heck out of my entire house! My first project was under the bathroom sink.

This area has always been a little unruly and hard to control. I forgot to take a before picture so I just grabbed one off Google that was close to what mine looked like (this is no joke):
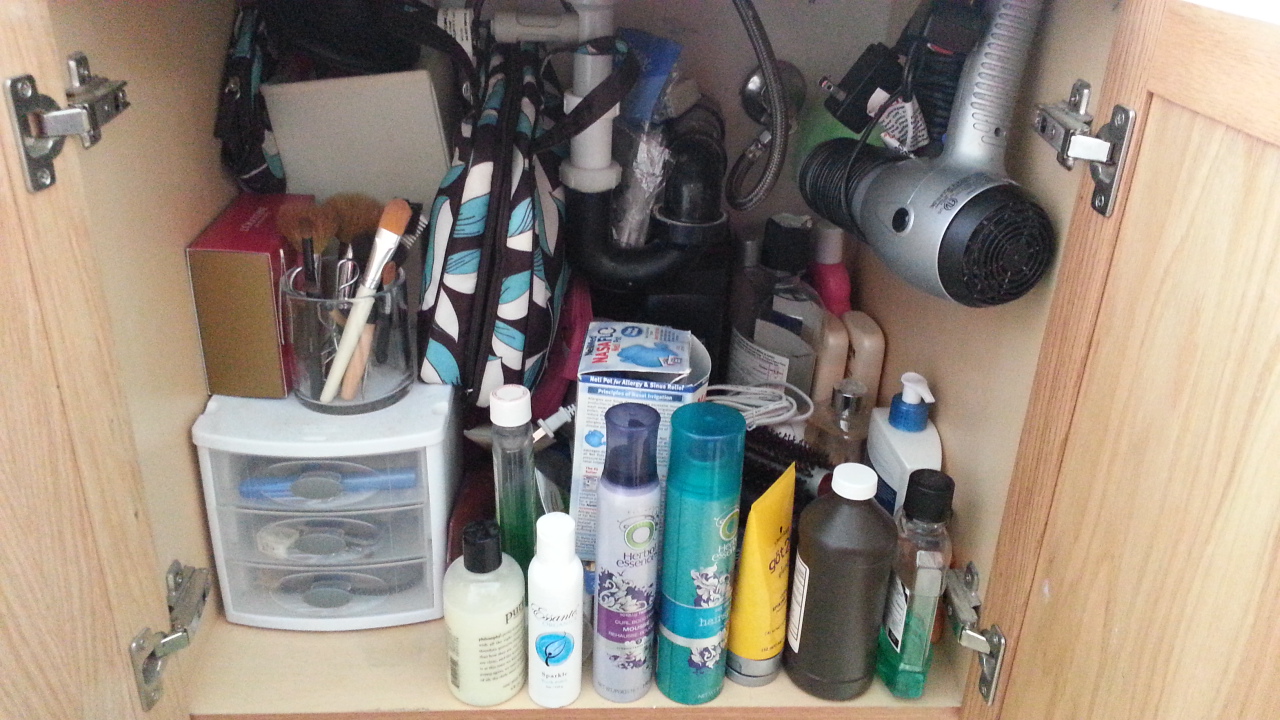
So even though that is not my cabinet, it looked almost exactly like that. It was really difficult to find anything in the mornings and I had to do a lot of digging. Not to mention there was almost no room for my poor hubby!
Now take a look at what a little bit of motivation and a little bit of time did for my cabinet:

This new bathroom cabinet makes me feel so happy! Its so clean and organized and everything has a home. Here is how I did this project:
Materials you will need:
1) 8 Medium Clear Bins (I found mine here! )
)
2) 8 Small Clear Bins (I found mine here!)
3) 1 Wire Mesh Organizer (I got mine at Storables but you can find a similar one here!) - This item is for your hot tools like hair curlers and straighteners.
4) Label Maker/Silhouette
5) Museum Putty (You can find this at Storables or Amazon)
6) Over the door Hairdryer Holder (I love this thing and I got it here!)
Step 1
Be sure to measure your cabinet before you buy any bins. You want to make sure that what you buy will fit! Once you have all your products in hand, you want to clean out your cabinet.
Step 2
Arrange your new bins in the correct formation that you would like. I put the small ones in the middle so I didn't have to worry about any of the bins running into the drain coming down from the sink.

Step 3
Once you get your arrangement right, put some Museum Putty on the bottom of the bottom bin in each row. You want to make sure that you get some in each corner so that once you place your bins where you want them, they don't move.
Step 4
Continue to build your stacks of bins being sure to put a little Museum putty on the bins where they connect. Just for good measure, I put some of the putty on the sides of my bins too so I could anchor them down to the sides of the cabinet as well.
Step 5
Fill all the bins up with whatever you would like!
Step 6
Once you have everything placed in the bins the way you want them, create some labels and your done!

I must give inspiration credit where it is due. I got the inspiration for this project from Alejandra.tv. Go check out her videos they are awesome!!

Hello! How exciting to be featured on your blog! Thank you :) Now off to visit more blogs :)
ReplyDeletecheers!
Ursula
http://kraftmint.com
Our bathroom is tiny so this is a great idea! Thanks for sharing!
ReplyDeleteWe have a tiny bathroom so I need all storage ideas I can get. Thank you for sharing!
ReplyDeleteThis small bathroom is the only one in the house so we really have to work to keep it organized! And now with a new family member on the way, I may have to re-do this space...again! Haha!
Delete